1. Introduction to Products
2. Navigating the Products page
3. Select Products: Additional Options and Configurations
a. Intellipanel
b. Premium Options
- Intellipanel
- Automatically Set Antigen Densities
- Inventory
- Preferences
c. Spectra Viewer
d. Spillover Matrix
e. Marker vs Channel - Data Display and Organization Options
- Highlight Products in Inventory
- Organize antigens by Co-Expression Group
- Organize antigens by conjugate availability
- Adjust spillover threshold warning
INTRODUCTION TO PRODUCTS
With the information about our cytometer selection from earlier, and the details we provided about the antigens and fluorescent reagents included in our panel design, FluoroFinder has now compiled selections of commercially available products and paired them with the appropriate channels on our cytometer.

The next step for you is to select fluorophore conjugates for each of your antigens, and then finally choose products from FluoroFinder’s database that match those selections.
NAVIGATING THE PRODUCTS PAGE
To select fluorophores and add products of interest to your panel, please follow these steps:
-
Scroll down to the Marker vs. Channel display – scroll down to beneath the spectral viewer (empty when first loaded as no fluorophores/products have been selected) where you will find a grid displaying your selected antigens (markers) from the prior step against the available fluorescent channels on your cytometer. In the intersecting cells, available fluorophore conjugates for a marker will be shown in their detection channel. See the image below for an example:

In the above image, CD3 shows available fluorophores across each of our 5 lasers. For the 355nm laser, options are available in multiple channels, including UV6, UV7, UV8, etc. The number of colored dots next to a channel indicates how many suitable fluorophore options are available in t hat channel.
Hovering over the dots will load a pop-up which indicates which fluorophores are available in that channel

In the above image, we can see the pop-up containing the available fluorophores in the UV16 channel of our Cytek Aurora.
-
Select fluorophores for each of your previously entered antigens/fluorescent reagents - Using the table outlined above, navigate through each of your entered antigens and select an available channel containing a fluorophore conjugate you'd like to use. Selecting an channel for an antigen will load a selection screen displaying all available fluorophores from your included suppliers (all suppliers by default) that are available in that channel, with warnings against spectral overlap if applicable. PLUS members may see indicators (seen below) that a particular antibody is in their inventory. Select a fluorophore to add to your panel:

When a fluorophore is selected for an antigen (Brilliant Ultraviolet 805 in this case), a screen will pop up displaying the associated products found in FluoroFinder’s database. Select a product to “+Add” to finalize your choice.

Once a fluorophore/product is selected, the grid display will grey out the associated row (and any already used channels for future antigens )to prevent any further selections for that antigen AND for the channel associated with the selected fluorophore. This is to prevent multiple antigens from being selected in the same channel. If multiple antigens are to be detected in the same channel, a dump channel will need to be created for this purpose (see: Dump Channels). When selecting antigens, be sure to use good panel design practices: where possible eliminate spectral overlap, separate antibodies for antigens expressed on the same cells across lasers, assign bright fluorophores to lowly expressed antigens, dim fluorophores to highly expressed antigens, etc.

Where Brilliant Ultraviolet is selected for CD3, FluoroFinder has greyed out the remaining choices for CD3, and also greyed out any choices for other antigens in the UV16 channel (see CD20 - UV16)
As fluorophores are selected the Spectra Viewer at the top of the page will update with the excitation and emission spectra of your selections. These can be viewed by laser line, or all together, using the buttons at the top left of the viewer. Additionally, as fluorophores are selected, the Complexity Score, providing a measurement of the complexity of compensating your panel, will be dynamically updated to provide an overview of how your selected fluorophores may affect data spread (see: Complexity Score)

Spectra Viewer displaying the configuration of a Cytek Aurora 5 laser, and excitation/emission for selected fluorophore Brilliant Ultraviolet 805. Beneath the plot are data points about the emission of the selected fluorophore at various wavelengths of light. The Spectra Viewer is a dynamically updated Complexity Score, providing a measurement of how the selected fluorophores may affect data spread
Continue selecting fluorophores/products until you have made selections for each of the included antigens/fluorescent reagents you added to your panel .-
Continue - once you’ve selected all your fluorophores/products, click “Continue>” at the top of the page to move to “Summary”

NOTE: There are a variety of optional features that can help you to narrow product offerings, view antibodies already in your inventory, customize data displays within the “Select Products” page. See “Select Products: Additional Options and Configurations” below for detail on these optional configurations.
-


SELECT PRODUCTS: ADDITIONAL OPTIONS AND CONFIGURATIONS
There are a variety of options available within Panel Builder to customize your search parameters and settings. Find instructions for their use below:
******************************Intellipanel************************************
Intellipanel – Turning on the Intellipanel slider will enable the automated panel design features of FluoroFinder (if you have an Academic Plus subscription or an Industry Subscription account). Intellipanel assists users by making informed product decisions for panel design based on user input, machine learning, fluorophore curation, etc.). NOTE: Enabling Intellipanel after fluorophores have been selected will affect the ability of Intellipanel to make recommendations. For best results, enable Intellipanel during Antigen Selection, or from being your design from the Intellipanel start page. For more information on Intellipanel, please contact support@fluorofinder.com.
************************PREMIUM OPTIONS*******************************
Clicking the "Premium Options button" (shown below) will open a settings box allowing you to control a variety of additional options and features of the FluoroFinder "Plus" subscription

From left to right, the buttons allow to open and modify the behavior of Intellipanel product selections, the ability to turn on/off auto-antigen density, selection of inventories, and the modification of supplier and fluorophore preferences, respectively.
For more information on Premium Options and how to configure them, please see the help file at: 1.0: Start Panel
NOTE:
On this stage of the panel building process, when using Intellipanel, preferred Fluorophores and Suppliers (![]() ) will be selected over other similar alternatives where possible. Further, preferred Suppliers and Fluorophores will be indicated in the panel grid:
) will be selected over other similar alternatives where possible. Further, preferred Suppliers and Fluorophores will be indicated in the panel grid:

****************************Spectra Viewer*********************************
SpectraViewer – By default, the SpectraViewer is in the shown. Clicking the "x Hide" button ![]() will close the SpectraViewer display. Users can also view the SpectraViewer in full screen by clicking the "View Full Screen" button
will close the SpectraViewer display. Users can also view the SpectraViewer in full screen by clicking the "View Full Screen" button ![]() . Within the conventional SpectraViewer, users can further customize their display by choosing to display individual laser lines or all laser lines
. Within the conventional SpectraViewer, users can further customize their display by choosing to display individual laser lines or all laser lines  , and by selecting a light or dark theme
 . The options menu
  provides methods for export of the SpectraViewer display.
*****************************Spillover Matrix*******************************
Spillover Matrix - Selecting "Spillover Matrix" will open the collapsed Spillover Matrix showing each selected fluorophore, its filter coverage in its own primary detection filter, and any filter spillover to other channels in which a fluorophore has been selected. This is a useful tool for determining how selected fluorophores may be contributing to spectral overlap and panel complexity.

Unexpanded Spillover Matrix Button

Expanded Spillover Matrix for several fluorophores. Note that CD19 and CD20 are both dump channel antigens, and thus have the same fluorophore selected. This is intentional, and both antigens are labeled (DC) to indicate they are in the dump channel
***Marker vs Channel - Data Display and Organization Options***
Data organization options – FluoroFinder provides a variety of options on how to organize and display the data in the fluorophore/product selection table. Each of these options can be found just above the table in a linear display
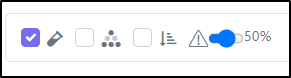
A description for each of these options is below:
----------------------------------Highlight Products in Inventory-----------------------------------
 - checking this box will place a message/indicator next to products that are in your inventory
----------------------------Organize antigens by Co-Expression Group--------------------------
 - checking this box will change the organization of your antigens on the x-axis of the table, organizing them by any co-expression groups defined during the “Select Antigens” stage. See: Co-Expression Groups
-------------------------Organize antigens by conjugate availability-----------------------------
 - checking this box will change the organization of your antigens on the x-axis of the table, organizing them from that with the least available fluorophore conjugates to that with the most. This can be useful in identifying which antigens may be limiting factors in your panel design due to limited product availability
-----------------------------------Adjust spillover threshold warning------------------------------
![]() - enabling this option will also include conjugation kits in the search results.
- enabling this option will also include conjugation kits in the search results.